Dear Friends of Rikaz-Group of Companies.
Asalamualikum and Ramadan 2024 Kareem!
Rikaz Cloud Service is gifting you today a free-of-charge Bitwarden Account to manage your Passwords, your browsers’ Favorites, Cards, Identity, and Secure Notes like bank account numbers, ID Card Numbers …etc.
here are the steps to create a free account and start using Rikaz Cloud Service for BitWarden
1- Start by visiting the system to create an account:
HTTPS://bitwarden.rikaz-group.com
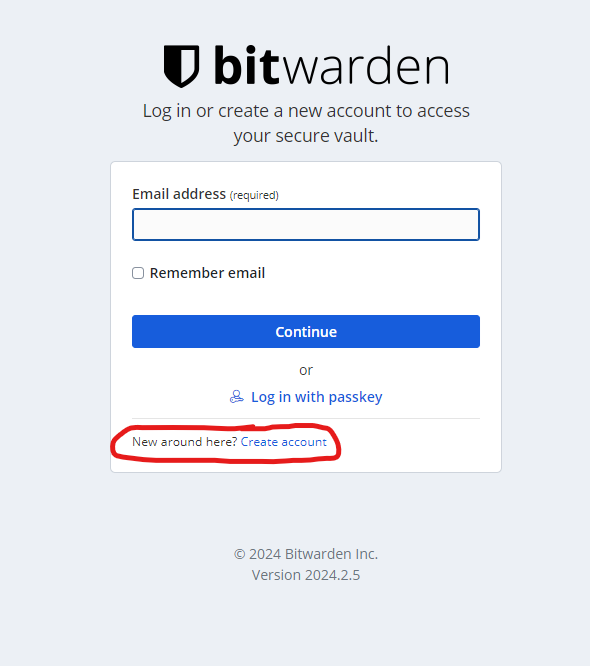
2-Click –> Create Account
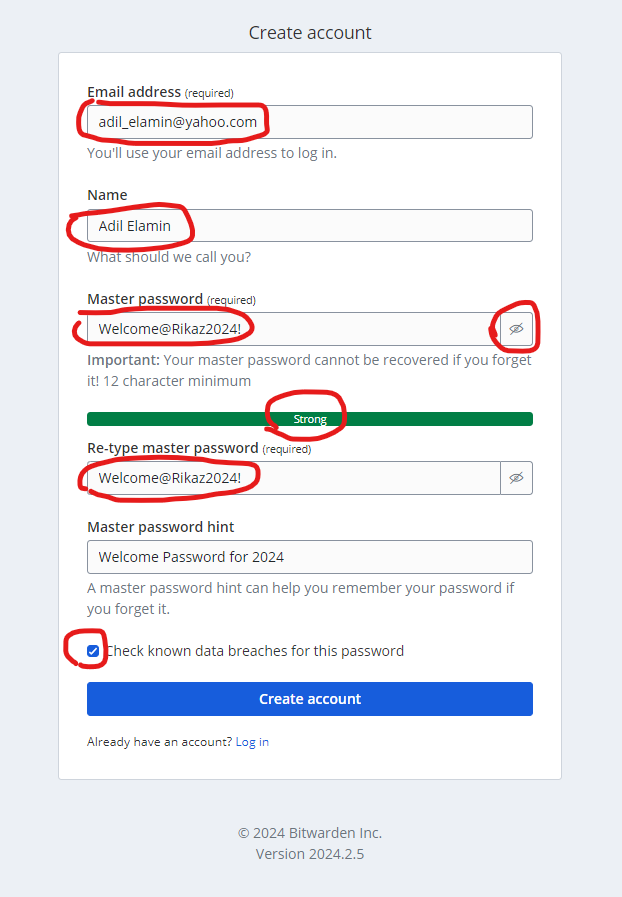
3- Register Your Data
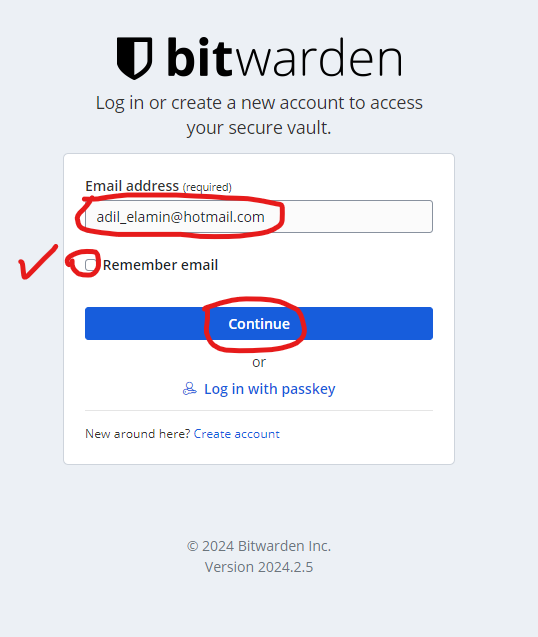
4- Login to your newly created account.
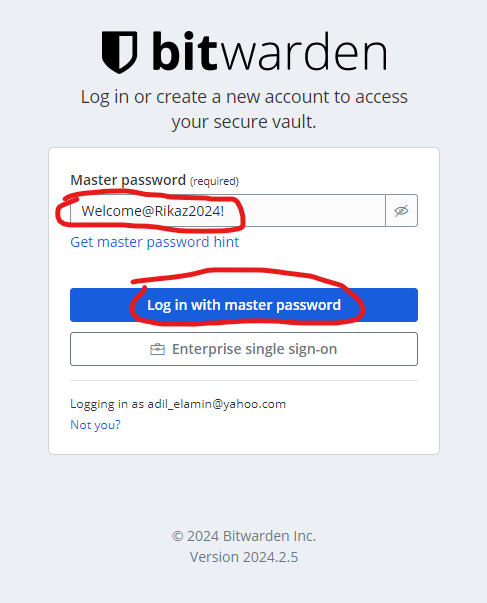
5- put the master password that you used during your account creation.
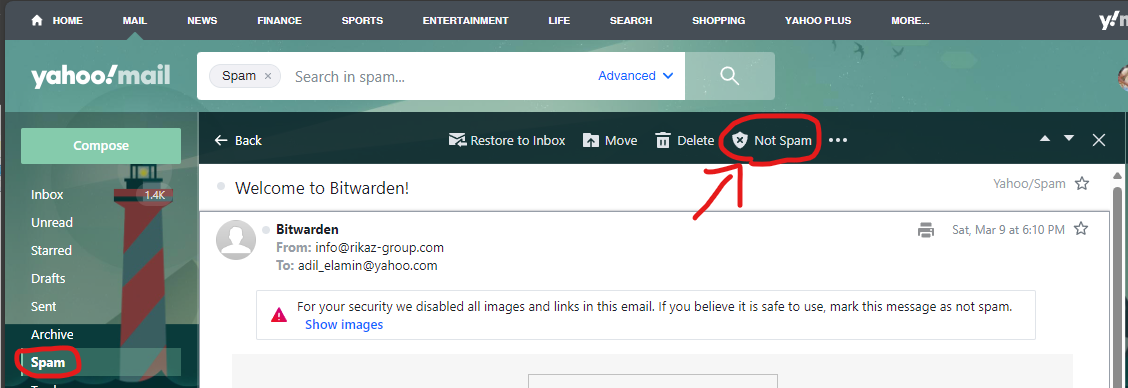
6- You are going to receive a welcome email from [email protected] maybe in the spam folder, mark the email as not spam and move it to your inbox.
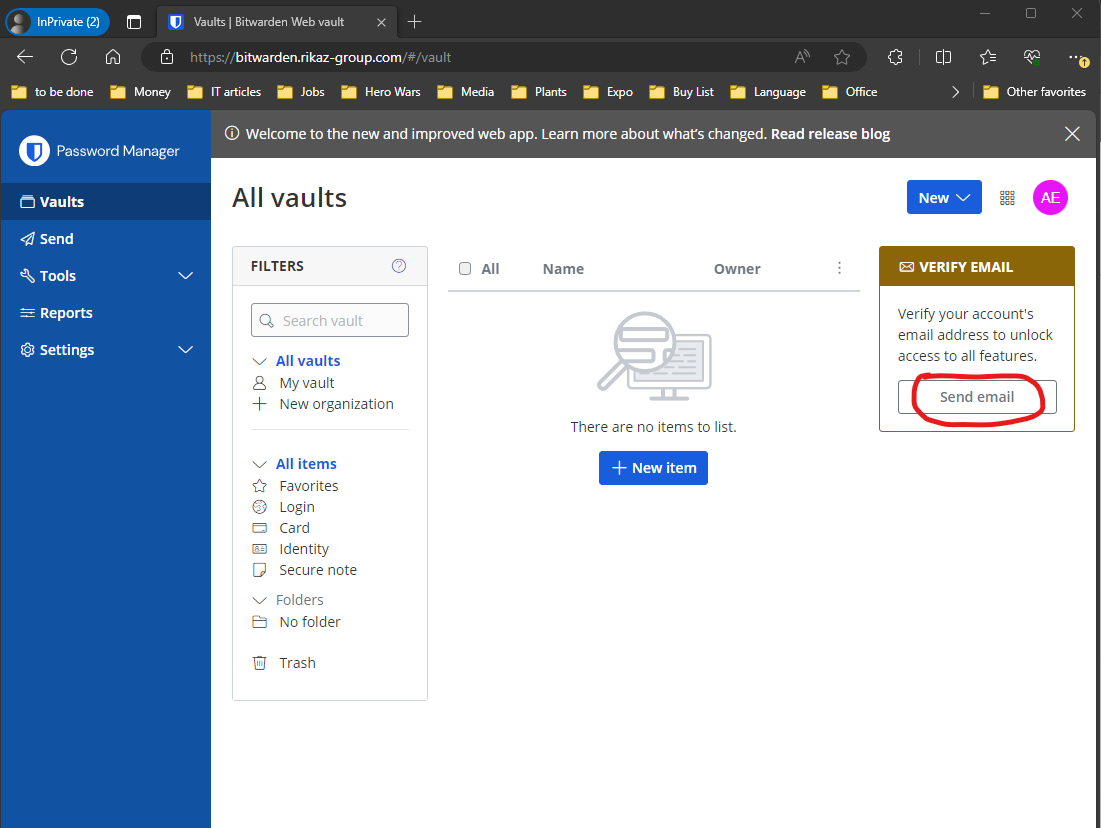
7- After you log into your account, the next step is to verify your email by pressing the Link
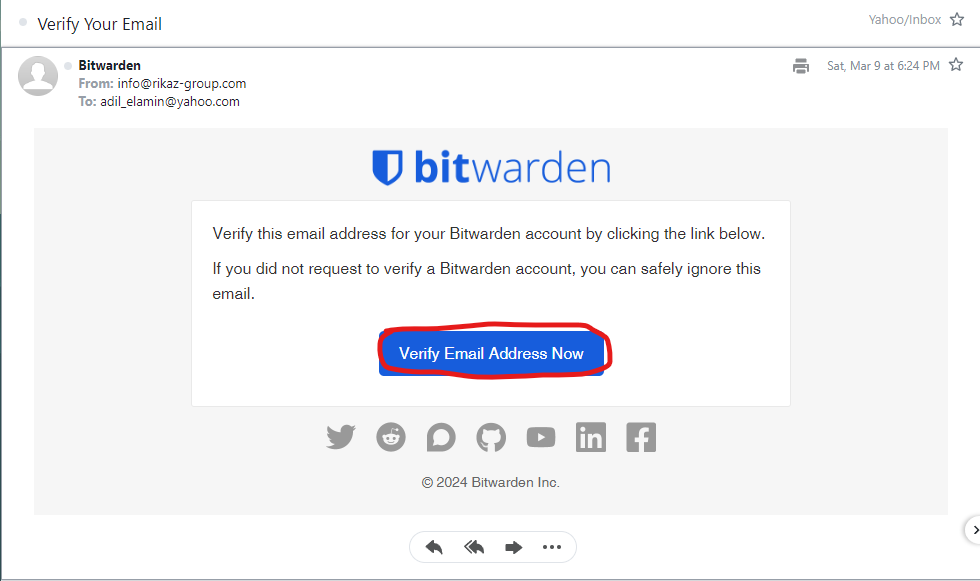
8- Login to the email that you used to register the free account click on “Verify Email Address Now” and you will receive a notification that the email has been successfully verified.
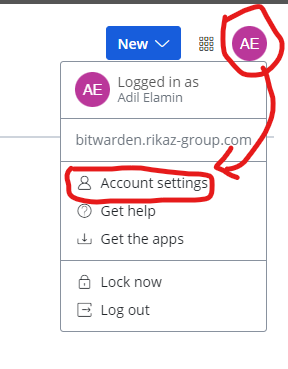
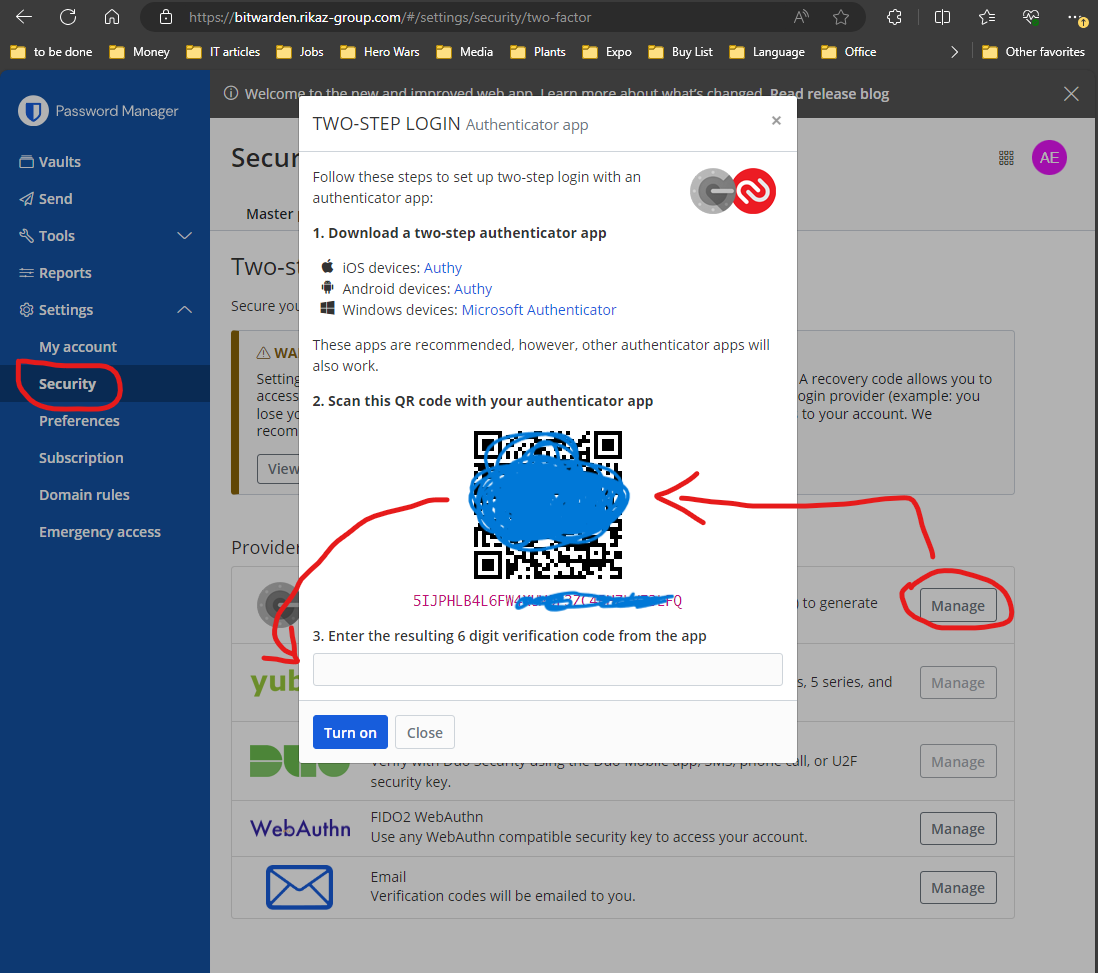
9- The next important step is to activate the two steps verification in your account by pressing on your account logo at the top right corner and press on “Account Settings”
10- Follow the steps in the picture, and open your Authenticator App to scan the barcode
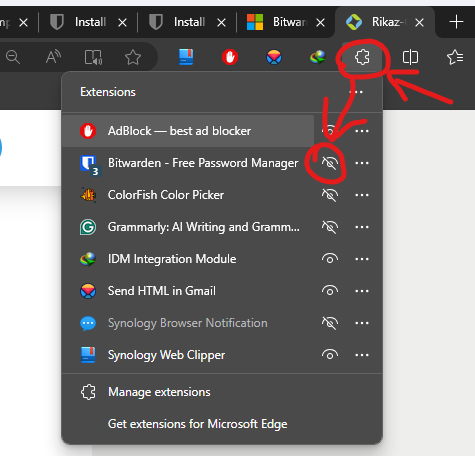
PIN the Bitwarden Extension to be always visible on the bar
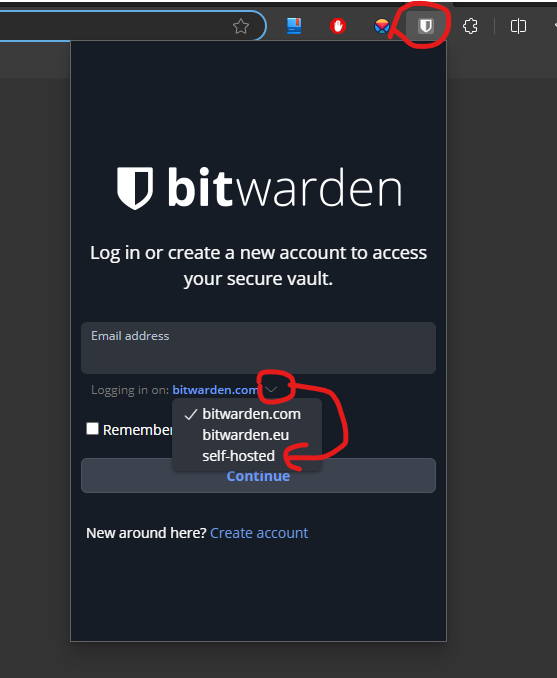
12- from the extension choose “self-hosted”
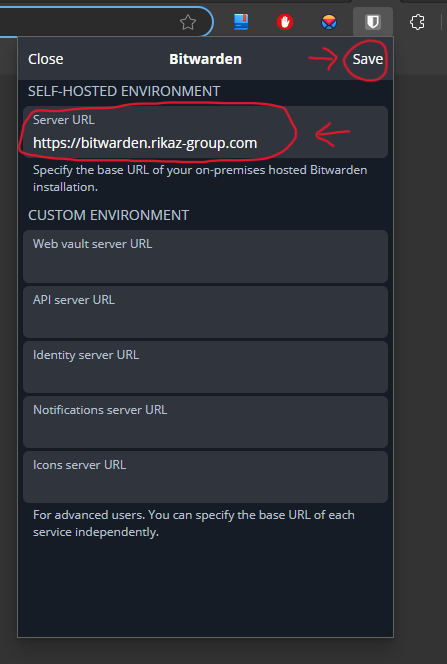
13- Insert the server address”https://bitwarden.rikaz-group.com” in the “Server URL” field and hit “Save”
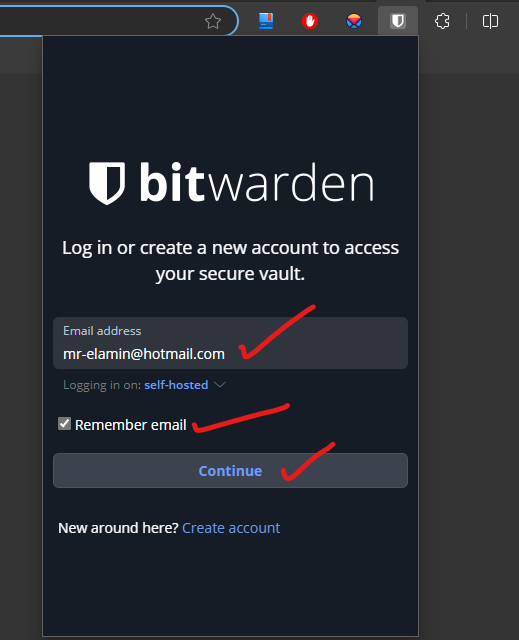
14- Now login to your BitWarden accout using your email and your MasterPassword.
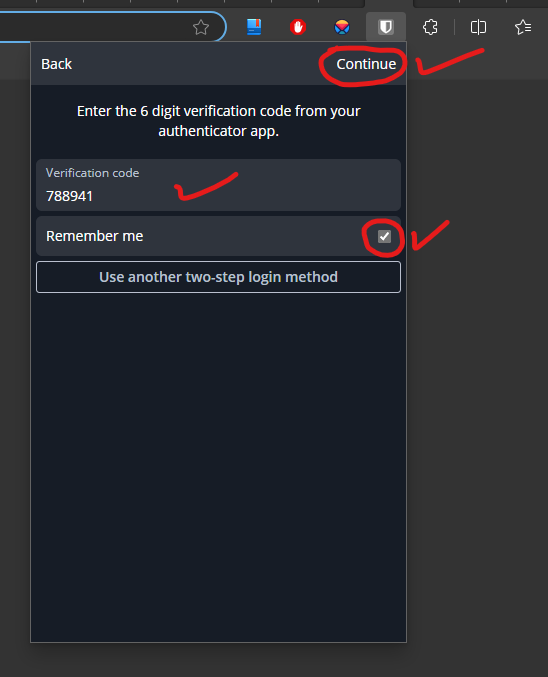
15 – You will be asked to insert the One Time Password OTP from the Authenticator App that you configured in the step No. 10, Put the code in here and enjoy using Bitwarden! 🙂
NOTE: This post will be updated regularry with more helpful information about the free Rikaz Cloud Service – Bitwarden.
Follow our Facebook and Instegram Page to stay up todate!